If an Apple computer will not connect to the MU-Secure wireless network, follow the troubleshooting steps below.
- Remove MU-Secure from the Preferred Network List
- Remove Stored Password and Certificate
- Remove the MU-Secure Wireless Profile: Mac OSX 10.8 and Newer
- Remove the MU-Secure Wireless Profile: Mac OSX 10.7 and Older
Once these steps have been completed, reboot and try to connect to MU-Secure again.
Remove MU-Secure from the Preferred Network List
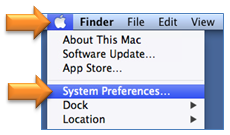
- Click the Apple button in the upper-left corner of the screen and select System Preferences.
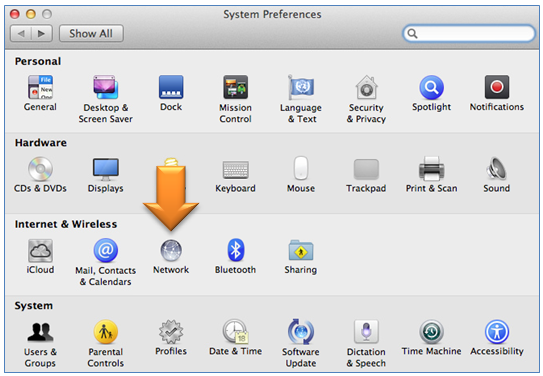
- Click the Network icon.
- Select Wi-Fi on the left, and click the Advanced button.

- Click on Wi-Fi. Select MU-Secure if it is in the list and then press the minus button.
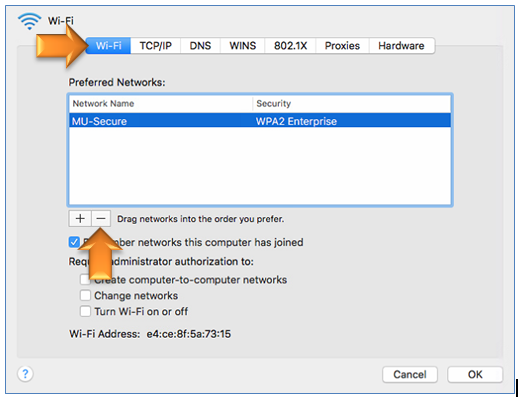
- Click OK.
Remove Stored Password and Certificate
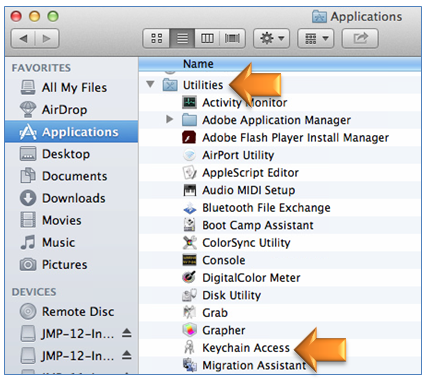
- Open the Finder, and select Applications -> Utilities -> Keychain Access.
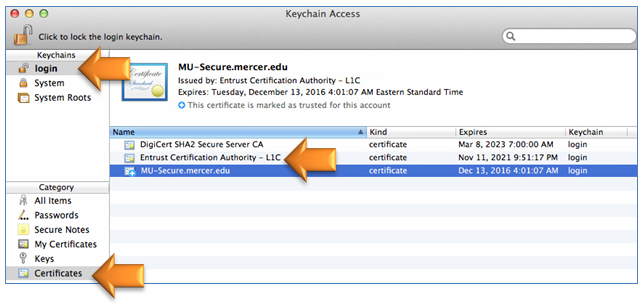
- Make sure login is selected in the upper-left, and then select Certificates in the bottom-left corner.
- If you see any reference to MU-Secure, or Entrust Certification Authority - L1C in the certificate list, click on it, click Edit in the toolbar, and select Delete.
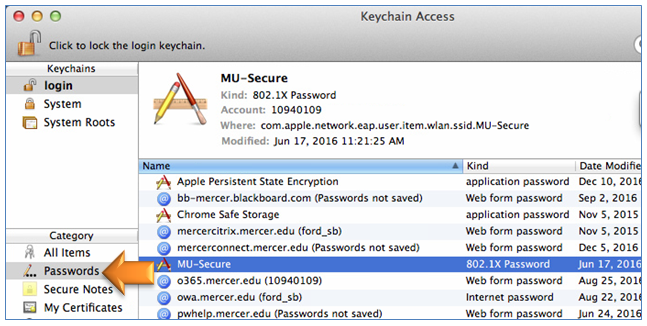
- Select Passwords in the bottom-left corner. If you see MU-Secure in the list on the right, click on it, click Edit in the toolbar, and select Delete.
Mac OSX 10.8 and Newer
- Click the Apple button in the upper-left corner of the screen and select System Preferences.
- Click the Network icon.
- Select Wi-Fi on the left, and click the Advanced button.
- Click on 802.1X. Under User Profiles on the left, select MU-Secure and then press the minus button.
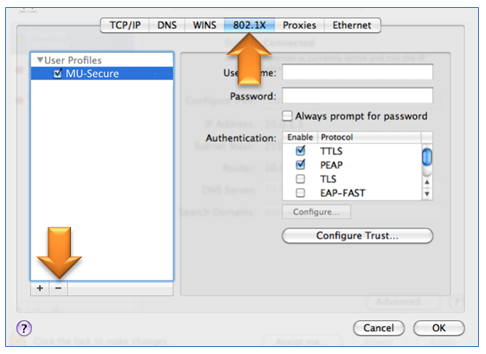
- Click OK and Apply.
Mac OSX 10.7 and Older
- Click the Apple button in the upper-left corner of the screen and select System Preferences.
- Click the Profiles icon.

- Under Profiles, select MU-Secure and then press the minus button.
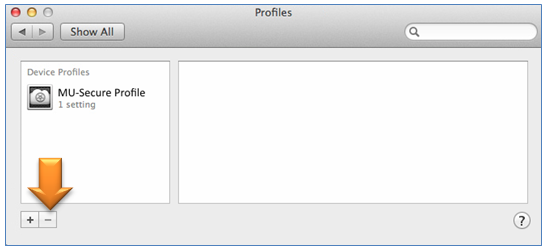
- Click OK and Apply.